How to Create your First Benchmark on Codabench
It’s free and easy

The progress in the field of machine learning mostly relies on benchmarks, which are fair comparisons between multiple models on the same problem. Platforms such as Kaggle, CodaLab Competitions or EvalAI let the community crowd-source the resolution of scientific and industrial tasks through public benchmarks, in the form of challenges or competitions. This short hands-on tutorial will give you everything you need to create your first benchmark!
Why Codabench?
Codabench, following the steps of CodaLab Competitions, is a new platform for hosting data science challenges, benchmarks and competitions. The good news is that it is free and open-source. It is modern and completely flexibile, allowing you to design any task you can think of! By editing the scoring program and providing your own datasets, you can tackle any task, and allow code submissions or results submission.
Once you have an account, you can already publish your first benchmark! The only limit is your imagination.
Get started
Let’s have a look at the Mini-AutoML Bundle.
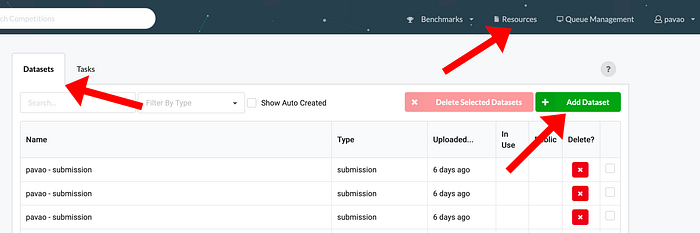
Upload the file named “bundle.zip” to Codabench as described below:


The main page of the benchmark should look like this:

Let’s now make a submission. To do so, download the file sample_code_submission.zip and upload it in the “My Submissions” tab of the benchmark. You will be able to view logs in real time during the processing of the submission. The leaderboard, available in the “Results” tab of the benchmark, will then be updated.
Customize benchmark
That’s cool and all… but I just re-created the Mini-AutoML Benchmark. I want to design my own task and include my awesome dataset! — You
To customize your benchmark, you need to change the files contained in the bundle and re-upload it. The bundle contains everything that defines the benchmark: HTML files, logo, datasets, ingestion and scoring programs, starting kit and the setting file “competition.yaml”. The ingestion program manages code submissions while the scoring program is used to score submissions.
Even if your bundle is already uploaded, it is still possible to edit the benchmark! The editor is one of the organizer features, namely “Edit”, “Participants”, “Submissions”, “Dumps” and “Migrate”.

Click on “Edit” to start customizing this newly created benchmark. By navigating a bit inside this menu, you can see that everything can be edited: the title and description, HTML pages, leaderboards settings, and so on. Let’s review some options
Fact sheets
In the first tab of the editor, you can enable “fact sheets” to gather more information about the submissions. Enabling fact sheets means that the participants will be asked to fill in some information when making submissions. You can fully customize the information fields, making them required or not, and choosing which information appears on the leaderboard. This can be used to display the name of the methods, the URL to the source code, or a description of the method. The gathering of metadata about the methods used is crucial when conducting a benchmark, and this interface makes it simple to gather all this information in one place.
Edit data and programs
Codabench provides an interface to upload Ingestion Program, Scoring Program, Starting Kit, Data (public/input/reference) etc.
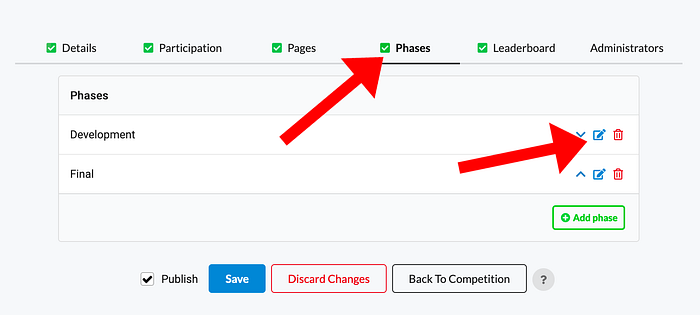
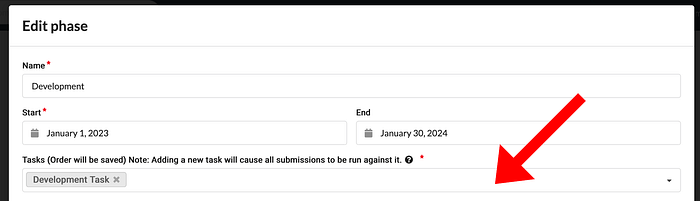
Once these are uploaded, a task can be created using the uploaded files. A task is a combination of Ingestion Program, Scoring Program, Input Data, and Reference Data.

In your competition editor, you can add, update or delete a task for each phase. Unlike CodaLab, Codabench allows you to have multiple tasks for each phase.
Submission rules
The submission rule programs the behavior of the leaderboard regarding new submissions. Submissions can be forced to the leaderboard or manually selected, can be unique or multiple on the leaderboard, etc.
You can edit the submission rule as follows:
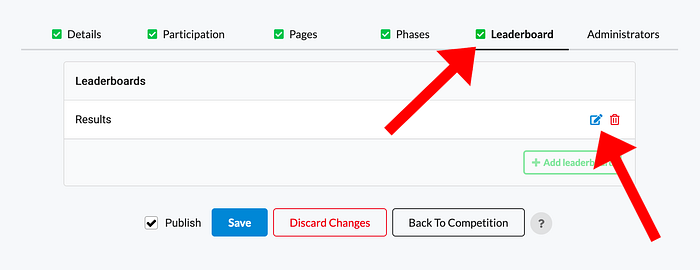
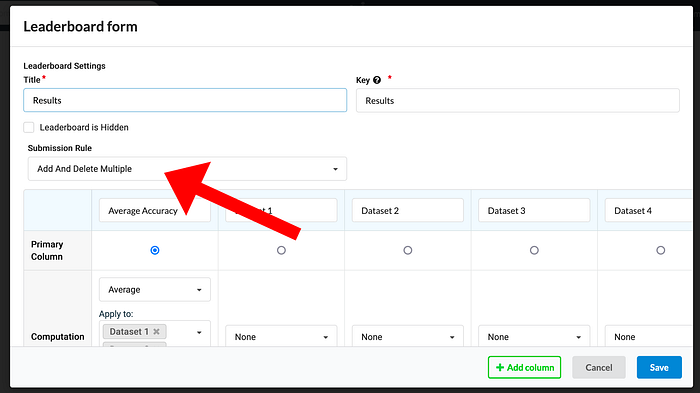
The current submission rule, “Force Last”, means that only the last submission of each participant will appear on the leaderboard. This is a classical setting for competition. Changing this rule to “Add And Delete Multiple” will allow the participants to manually select which submissions will appear on the leaderboard, and multiple submissions per participant on the leaderboard are allowed.
Add submissions to the leaderboard
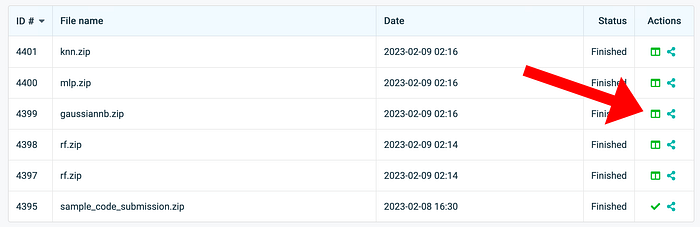
Now that the leaderboard is set up, let’s submit different variations of the code of the model from the sample_code_submission.zip. This example code submission simply calls a classifier from Scikit-Learn [1]. Replace the DecisionTreeClassifier with the classifier of your choice. Remember to differentiate the different submissions by filling the “Method name” in the fact sheet. Once your submission is processed, click on the leaderboard button under “Actions” in the submissions table to manually add them to the leaderboard.
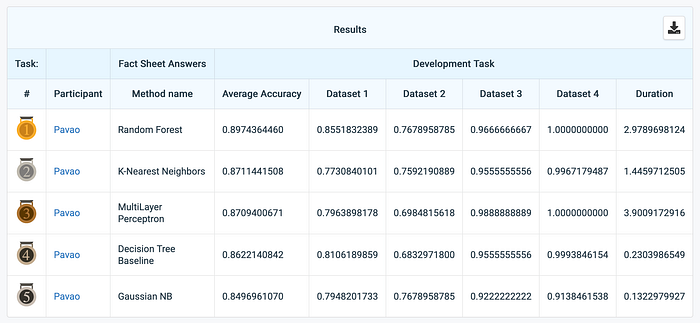
The leaderboard finally looks like this:
Conclusion
Congratulations! You have learned the basics of Codabench, and now you can organize your own benchmarks! However, we barely scratched the surface of all the possibilities offered by this platform. To learn more, you can refer to the Codabench Documentation.
From the documentation, you will learn how to link your personal compute workers (CPU, GPU), how to customize the ingestion and scoring programs, how to define complex leaderboards with multiple criteria, or even how to deploy your own instance of the platform. You can also join the effort and develop your own features!

References
[1] F. Pedregosa, G. Varoquaux, A. Gramfort, et al. Scikit-learn: Machine learning in Python. Journal of Machine Learning Research, 2011.